Welcome to the beginning photography! First of all, please know that I don’t claim to be an expert. I am here to share my own journey in the digital photography world with you. Many years back as a beginner, I too found myself asking myself the very same question.
![]()
![]()
![]()
![]()
Configure your new DSLR
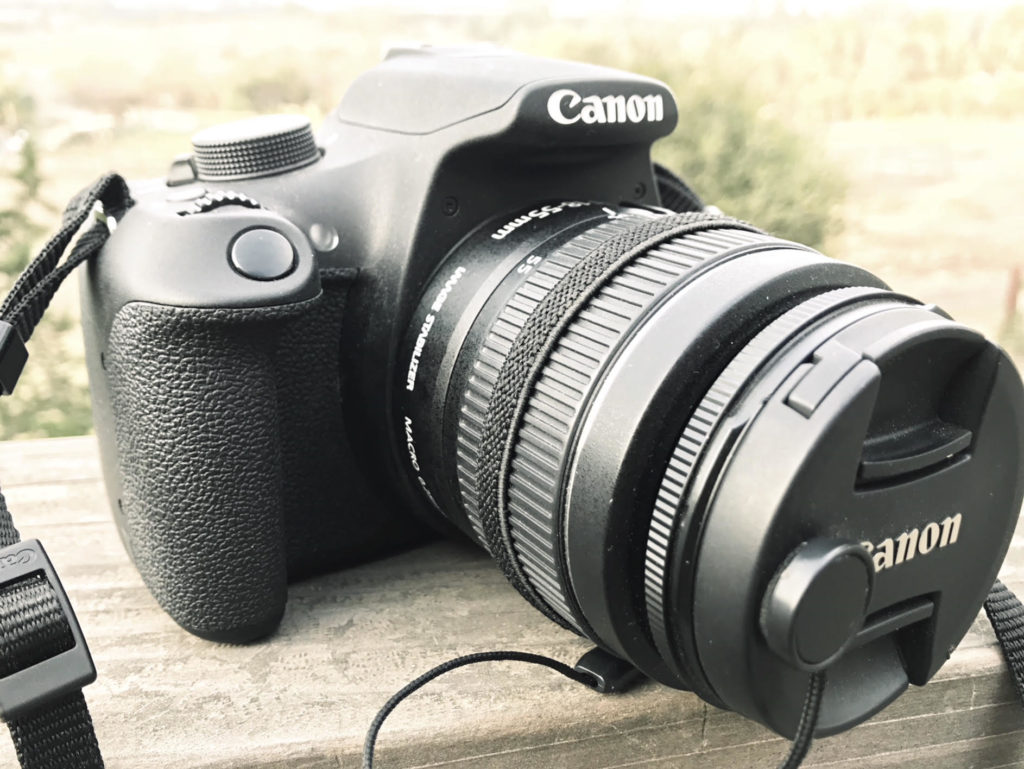
I remember when I bought my first DSLR (Digital Single-Lens Reflex.) I was super excited but intimidated at the same time. With all these new buttons, dials, and LCD screen, I found myself saying, “Now what? Where do I go from here?” I felt lost!
As a beginner configuring your 1st DSLR can be overwhelming. I stuck to the basic principals and choose my settings based on something like these situations:
– The speed of my subject
– The environment that my subject is in
– The lighting depending on the time of day
Next, I determine my priority.
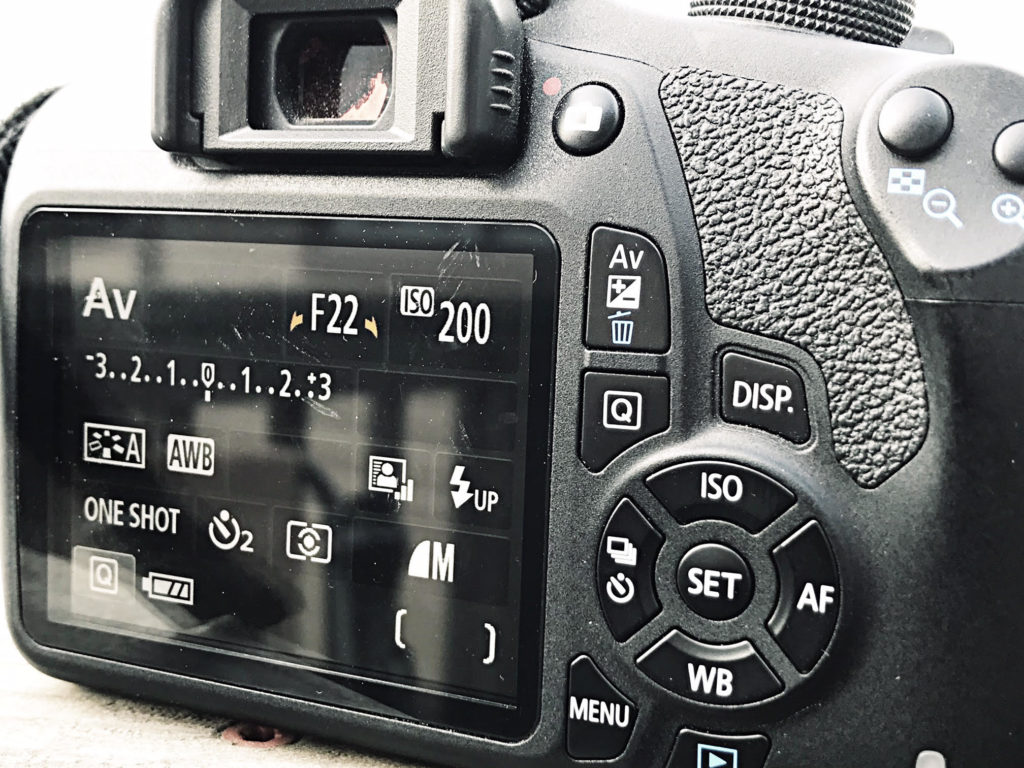
When I want to capture a moment of a moving subject, I will need to freeze it. In order to do so, I need to set the shutter speed first. Next, I set the ISO. Then, I set the aperture.
When I want to capture a subject in very low light condition, I will set my ISO first. Next, I set the shutter speed. Then, I set the aperture.
![]()
![]()
![]()
![]()
Understanding basic fundamentals
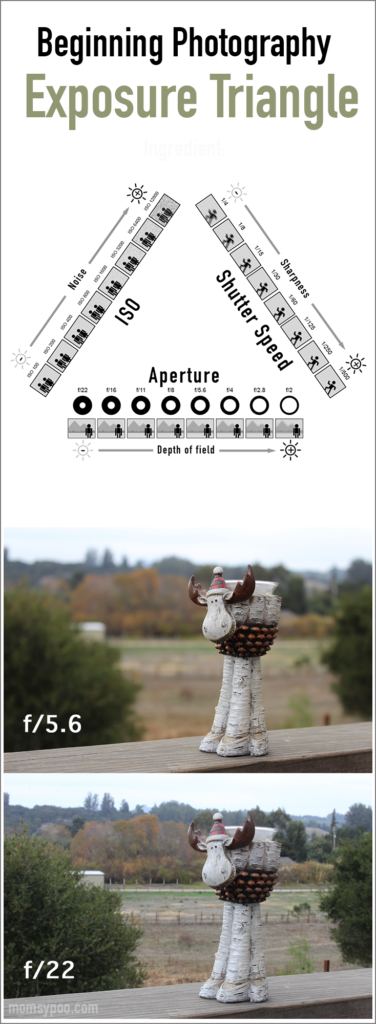
Since we are talking about beginning photography, I think the basic fundamentals is to understand the Exposure Triangle. The exposure triangle is the basic relationship between 3 elements: Shutter Speed, Aperture, and ISO. The goal is to get all three elements working together so you get the results you desire.


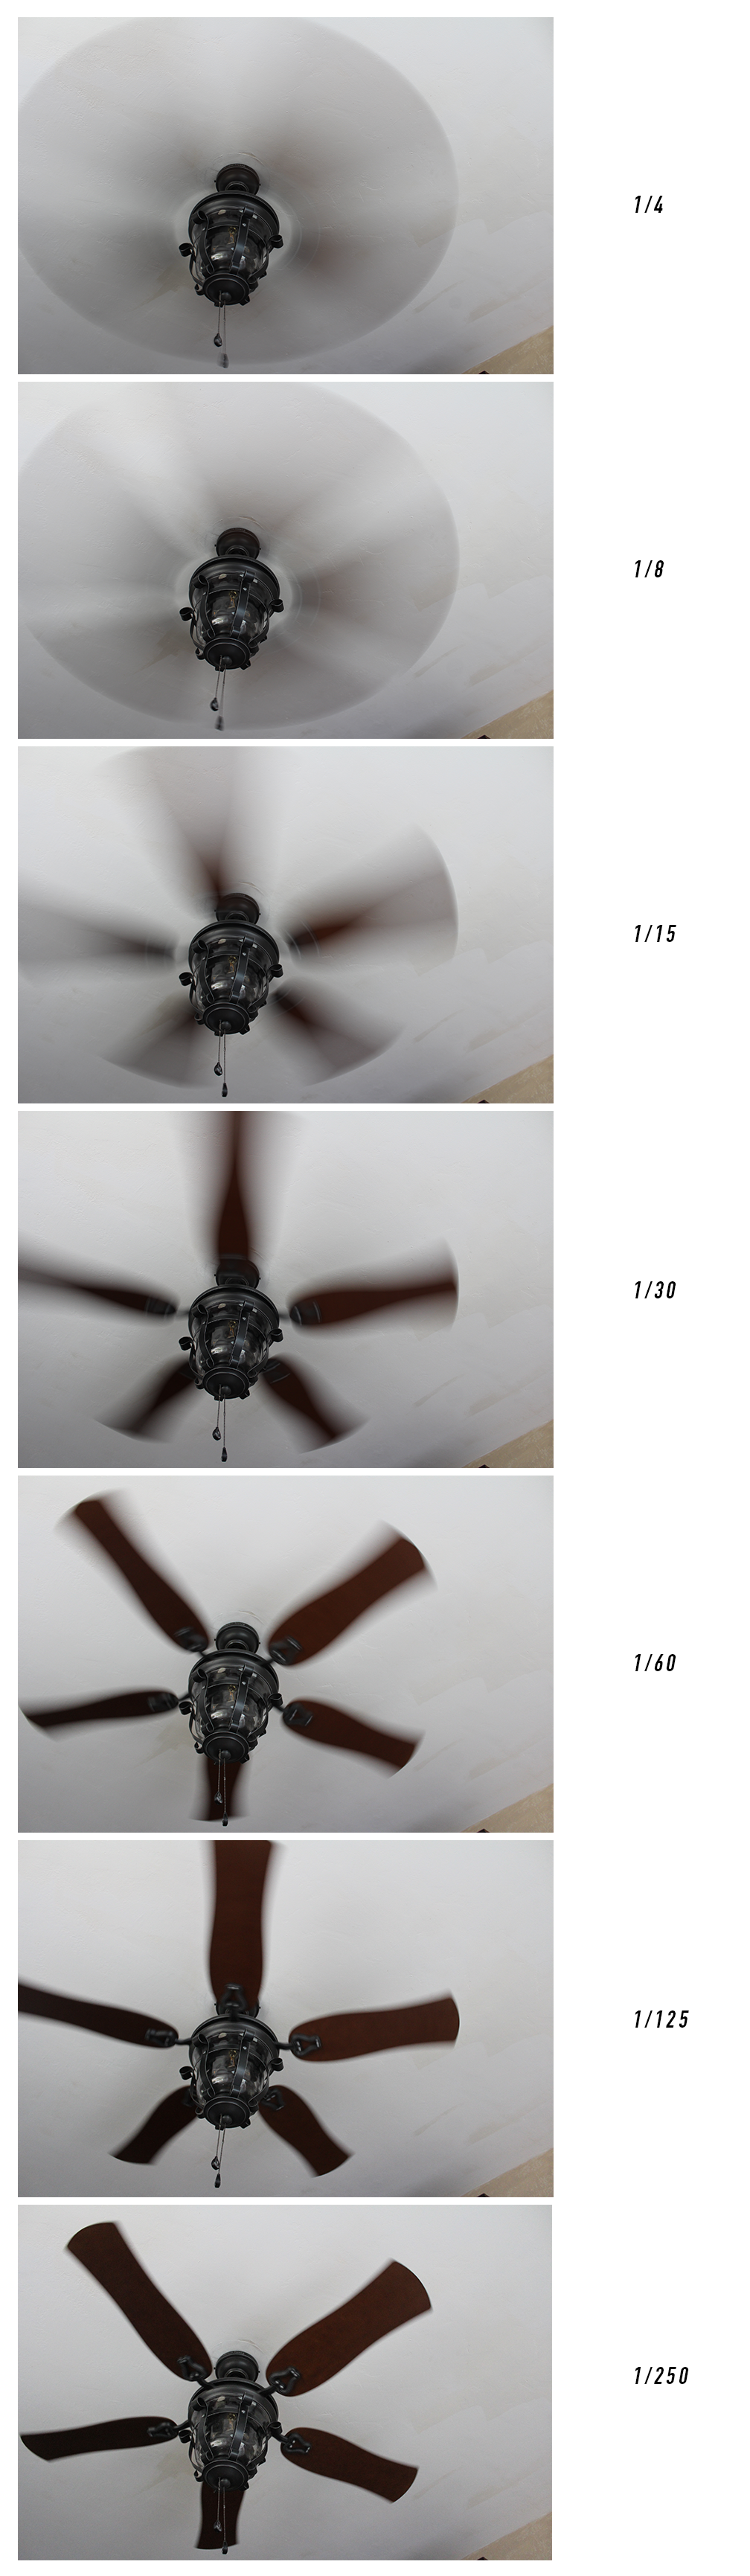
1. Shutter Speed
Shutter Speed is the length of time the shutter is open. The longer the shutter stays open the more light gets through. In short, the shutter speed controls how slow or fast the camera records the picture. This allows us to blur or freeze any motion while shooting a picture. The shutter speed typically measures in fractions of a second.
For example, 1/4 means a quarter of a second. 1/500 means one five-hundredth of a second. A lower number will blur the picture, a higher number will freeze the picture.


2. Aperture
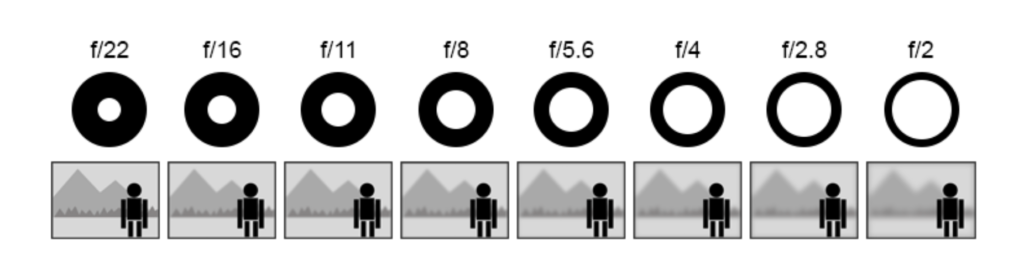
Aperture is the size of the opening of the lens. The bigger the opening, the more light it lets in. The aperture size plays a part in controlling the depth of field. The wider the aperture the more depth of field. The aperture measured as an f-number or an f-stop. The smaller the number makes a bigger opening size.
For example, f/4 lets more light in than f/22.


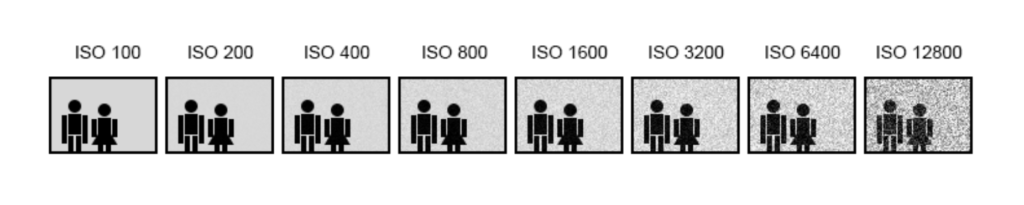
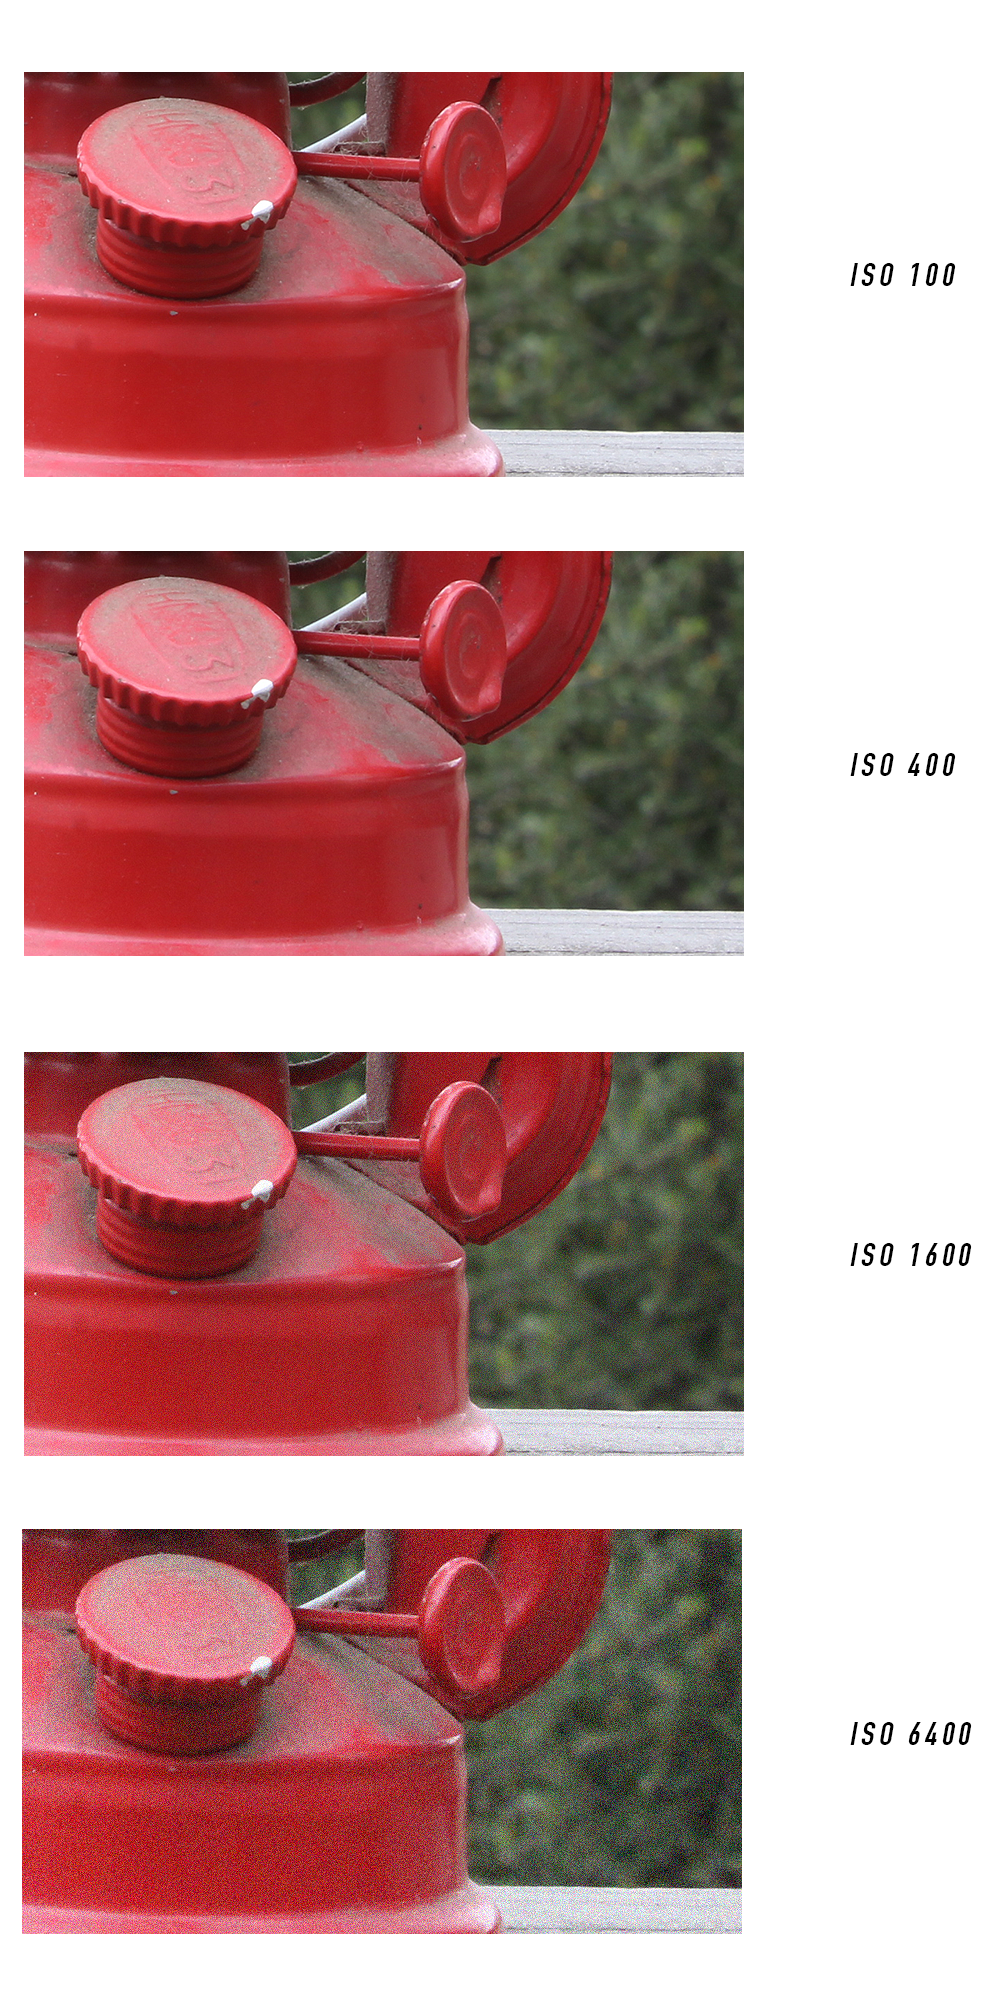
3. ISO
ISO is an abbreviation for International Standards Organization. It’s a standard way to measure light sensitivity. In the olden days, it’s was used to measure how sensitive camera film was to light. However, today it’s used to measure the sensitivity of a digital sensor inside a camera.
The lower ISO the less sensitive to light. The higher ISO the more noise added to the picture.
For example, ISO 100 is best used on a sunny day. ISO 400 is best used indoor with low light.


Now that we know what each element does. Let’s take a look at real-life examples.
Shutter Speed – blurs/freezes the subject
*I used my living room ceiling fan with the slowest speed.


Aperture – controls the depth of field
*Notice the background.


ISO – controls light sensitivity
*Noticing the noise in each picture.


Which DSLR camera to buy?
This is a personal thing that you need find out. So many to choose from such as; Nikon, Canon, Pentax, and etc. I am a Canon kinda guy, so of course, I will recommend a Canon 🙂 If you are on a tight budget, you still can get your hands on a nice and cheap DSLR without losing arms and legs.
![]()
![]()
![]()
![]()

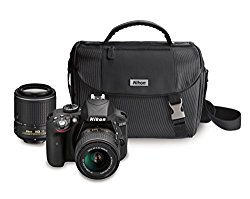
Canon Rebel EOS T5
You can get a bundle package that comes with 2 kit lens; EF-S 18-55mm IS II standard zoom lens and EF 75-300mm telephoto zoom lens with f/4-5.6 maximum aperture and bag. A pretty good deal for a starter and it shoots great.
![]()
![]()
![]()
![]()
 Nikon D3300 DX-format DSLR Kit
![]()
![]()
![]()
![]()
Also great for a starter. It comes with 2 kit lens; 18-55mm DX VR II and 55-200mm DX VR II and bag.
Conclusion Beginning Photography
My concluding post regarding Beginning Photography. I hope that the samples above will help you have a better understanding of how the exposure triangles work. From here on, you should be able to apply these basic principals to your next shot.
On my next post, I will be talking about Camera Modes. Remember to come back and check out my site. I’ll see you soon.
If this your first time here, please visit my other posts at www.midnightspidy.com.
Happy Shooting 🙂
![]()
![]()
![]()
![]()

PS. You might want to check out these entry-level cameras.
Nikon D3400
With AF-P DX NIKKOR 18-55mm f/3.5-5.6G VR Lens, 32 GB SDHC and Basic Bundle![]()
![]()
![]()
![]()